
This time, I thought I'd do an Altered Book for a change. This one is titled 'Vintage', as that's the word on the front, lol. This is one of my samples as part of the Imagination Crafts DT.
 This was an actual hardback book, bought in a charity shop (this isn't cruel to books - any that the charity shops don't sell end up as landfill, so actually I'm saving it!)
 First step: cut the page block out of the book, making sure you don't damage the spine. Use a sharp craft knife and a ruler with a metal edge.
Next step, cover the book. I covered first with a scrapbook paper, using Magi Bond glue diluted 50:50 with water, leaving a margin of about 2cm all round the book. This was so I had a good smooth base to adhere my rice papers (the scrapbook paper was a very pale one with virtually no pattern - text weight paper or a light cartridge paper would also work).
Cut off the corners diagonally, leaving a tiny space (2-3mm) away from the corner of the book, so the paper will fold over without any ugly gaps.
 With the book cover laid flat on the glued side of the scrapbook paper, fold over the edges: the top and bottom first, push in any excess at the corners, then fold over the sides. Add more glue if you need to.
Flip over to the right side and smooth down, pressing into the creases at the spine so that the book will open and close easily.
 Place blotting paper (or kitchen roll) on top and underneath, and place under a weight to dry (pile of magazines, telephone directory etc).
If the inside of the book is really rough, repeat but cut the paper about 1cm smaller than the book. This will give a really good foundation for your rice papers.
 Now the book is totally dry, it's time to decorate! I used sections of rice paper (always trace round elements with a damp brush - it's easier to tear and the feathery edge are virtually invisible when glued down).
 Finishing touches:
Starlights paint in Bright Gold applied round the edges with a finger, and blended in. The crystals on the rice paper (front cover) needed to stand out a bit more, so I added Magi Glaze. This is a dimensional adhesive, and the trick is to draw a thin bead around the outer edges of the images with the nozzle of the bottle, then flood in with more glue. This adds a barrier and stops it running all over the place. You also need to dry the glue completely flat - if the surface is sloping, the glue will slide.
 The pages:
I decided to use pink paper - why not? I cut the pages the same width as the book, and the same height as the book, and folded them in half, arranging in groups of 4. Next, I used a scrap of paper the same height as the book, around 2inches (5cm wide) folded in half as a stitch guide, and made 2 holes in this near the centre. I placed this guide in the middle of each signature (group of pages) and pierced the holes.

Next, I used long lengths of a very thin ribbon, starting at the inside of the signature, and threaded the ribbon in through one hole and back out the other, then knotted the ribbon around the spine of the book. I repeated this for each signature.
 Final touches:
I used the ends of one set of ribbon to group all the ribbons together and ties in a knot. I used Rusty Patinas to age a couple of old keys, tied those on, and then cut off the excess ribbon.
Voila, job done, and a very pretty book which will be a pleasure to journal in.
All materials from Imagination Crafts.


Next step, cover the book. I covered first with a scrapbook paper, using Magi Bond glue diluted 50:50 with water, leaving a margin of about 2cm all round the book. This was so I had a good smooth base to adhere my rice papers (the scrapbook paper was a very pale one with virtually no pattern - text weight paper or a light cartridge paper would also work).
Cut off the corners diagonally, leaving a tiny space (2-3mm) away from the corner of the book, so the paper will fold over without any ugly gaps.

Flip over to the right side and smooth down, pressing into the creases at the spine so that the book will open and close easily.

If the inside of the book is really rough, repeat but cut the paper about 1cm smaller than the book. This will give a really good foundation for your rice papers.


Starlights paint in Bright Gold applied round the edges with a finger, and blended in. The crystals on the rice paper (front cover) needed to stand out a bit more, so I added Magi Glaze. This is a dimensional adhesive, and the trick is to draw a thin bead around the outer edges of the images with the nozzle of the bottle, then flood in with more glue. This adds a barrier and stops it running all over the place. You also need to dry the glue completely flat - if the surface is sloping, the glue will slide.
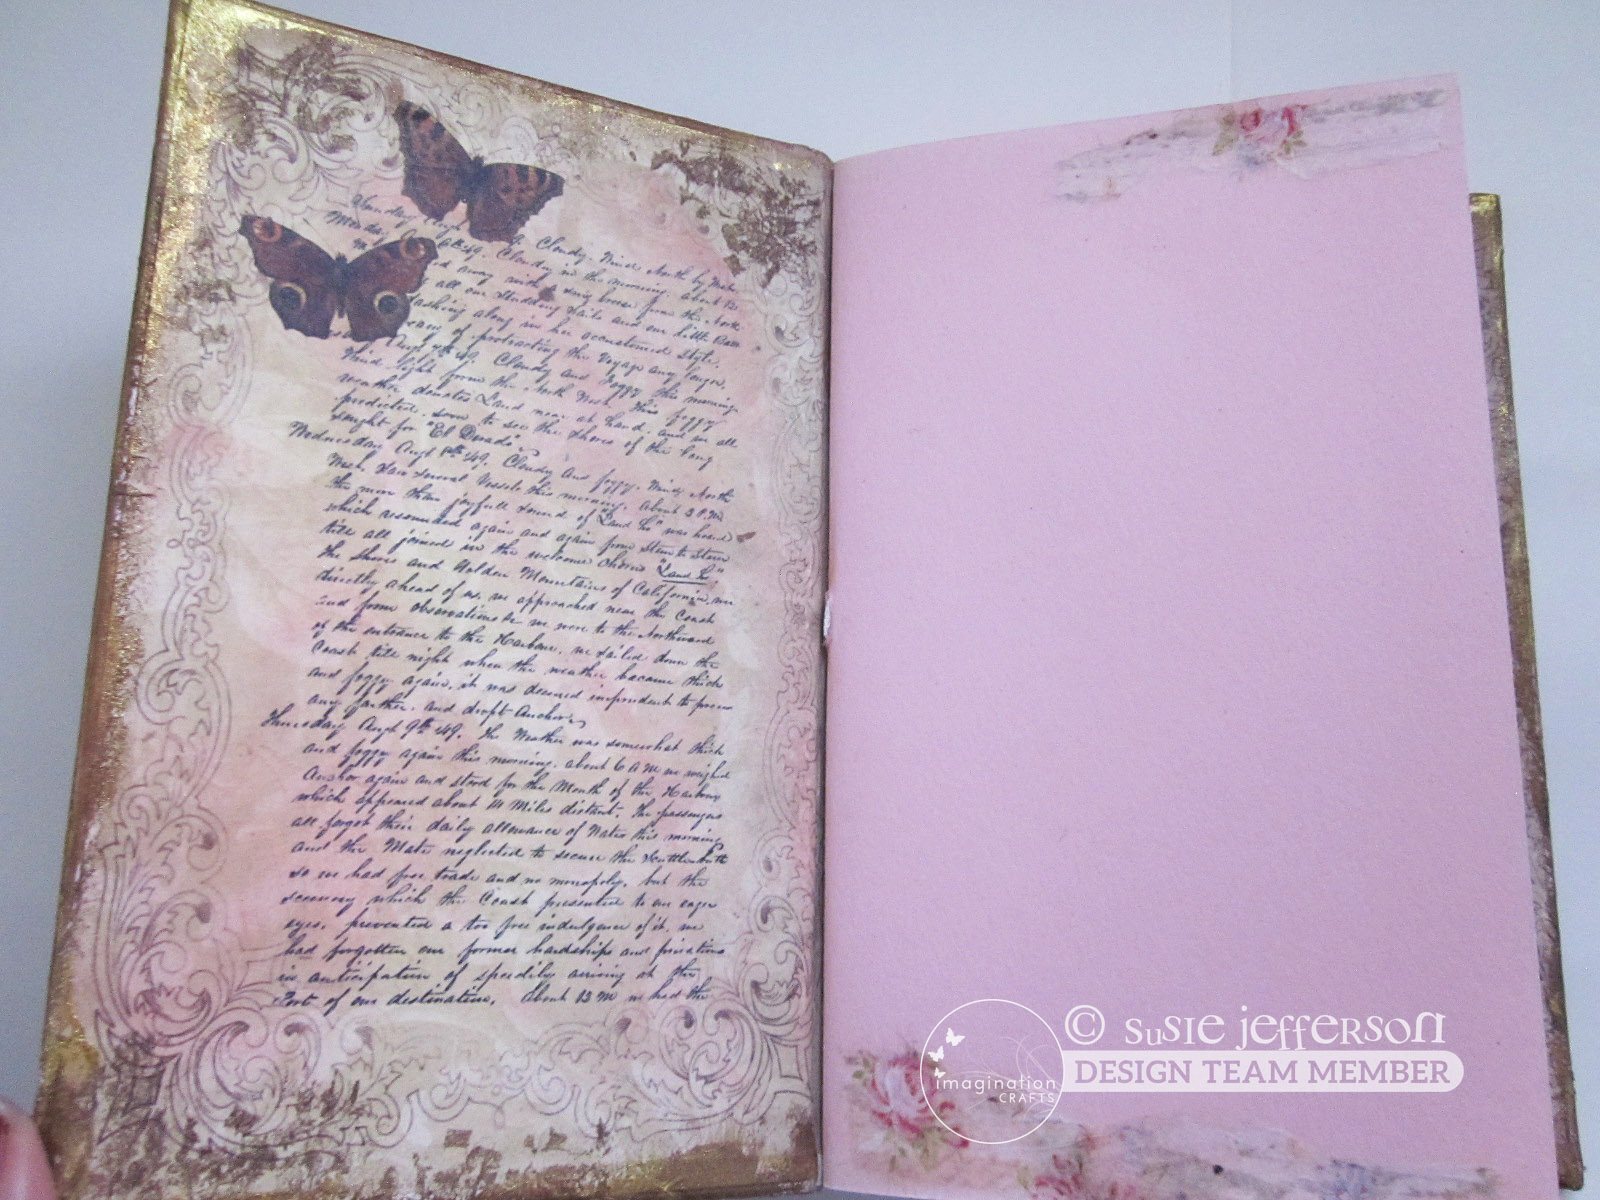
I decided to use pink paper - why not? I cut the pages the same width as the book, and the same height as the book, and folded them in half, arranging in groups of 4. Next, I used a scrap of paper the same height as the book, around 2inches (5cm wide) folded in half as a stitch guide, and made 2 holes in this near the centre. I placed this guide in the middle of each signature (group of pages) and pierced the holes.

Next, I used long lengths of a very thin ribbon, starting at the inside of the signature, and threaded the ribbon in through one hole and back out the other, then knotted the ribbon around the spine of the book. I repeated this for each signature.

I used the ends of one set of ribbon to group all the ribbons together and ties in a knot. I used Rusty Patinas to age a couple of old keys, tied those on, and then cut off the excess ribbon.
Voila, job done, and a very pretty book which will be a pleasure to journal in.
All materials from Imagination Crafts.
Comments
Post a Comment
Thank you so much for leaving a comment!